
This article will take you to the easy steps for setting up Hyperledger Fabric v 2.1. It will be in reference to the Hyperledger Fabric Official Documentation, with short explanations at each & every step to save your time. I have seen, there are small-small things which people usually miss while setting up a fabric-network and face a lot of difficulties because of choosing the wrong version of dependencies, exporting wrong paths and many more things. So, my main motive to write this blog is to see you running the test-network, without missing anything.
* I will be using a Ubuntu 18.04 VM, on GCP for setting up the test-network.
Aye Aye Captain!! 🚢, let’s sail…
Installing the Pre-requisites & Getting the fabric binaries:
Just keep following the steps with me 😉:
- Install curl, docker, docker-compose, nodejs & npm.
sudo apt install curl docker docker-compose nodejs npm
2. Install golang
Don’t install golang using apt, because ubuntu generally maintains an older version of golang 😕. Use official website of golang to download it, and follow me:
a)Use curl or wget to download the current binary for Go from the official download page:
wget https://dl.google.com/go/go1.14.2.linux-amd64.tar.gz
b)Extract the tarball
tar -xvf go1.14.2.linux-amd64.tar.gz
c)Adjust the permissions and move the go directory to /usr/local:
sudo chown -R root:root ./go
sudo mv go /usr/local
d)Adjust the Path Variables in .bashrc
export GOPATH=$HOME/go
export PATH=$PATH:/usr/local/go/bin:$GOPATH/bin
e) Load the file commands into the current shell instance
source ~/.bashrc
Note: Always check the minimum-version of any of the pre-requisites to avoid hustle.
3. Enable docker to run on
sudo systemctl enable docker
4. Add you, user, to the docker group
sudo usermod -a -G docker <username>
5. Install Fabric binaries
curl -sSL https://bit.ly/2ysbOFE | bash -s
6. Export path to your download location of fabric samples
export PATH=<path to download location>/bin:$PATH
You can see the following docker images pulled in your system now, by using
docker images

Okay, after all this you are now in stage to test the first-network example provided by hyperledger fabric.

Playing with the Fabric test-network bed:
To begin, change the current directory to the test-network folder and let’s move on.
Make sure there is no container related to Hyperledger Fabric is running before proceeding. Use these commands to stop them:
./network.sh down
or
docker rm $(docker ps -aq)
Architecture of test-network:
The test-network which comes with Fabric v2.1 contains 2 Organizations with 1 Peer each and an Orderer organization with 1 peer.
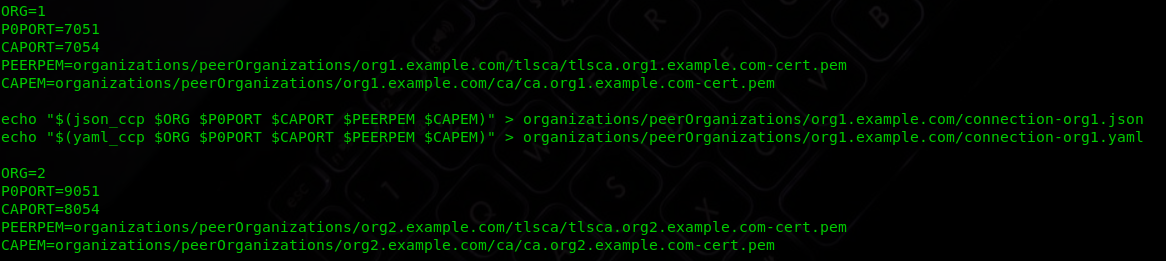
You can see the ccp-generate.sh for knowing configurations related to orgs.
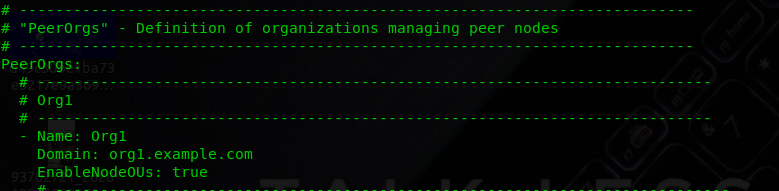
Also, configuration required to generate the crypto materials for peers and orders is present in yaml files in cryptogen folder.
Check out some snaps 📷 from crypto-config-org1.yaml file from the cryptogen folder:
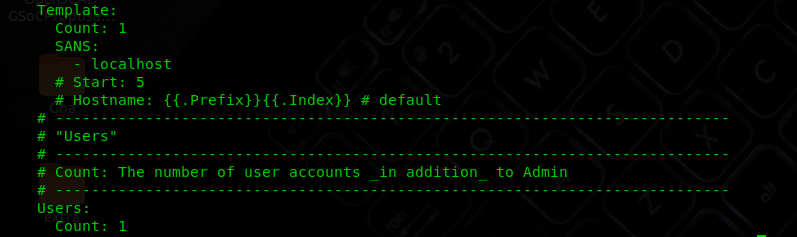
You can see the Template Count set to 1. It corresponds to the fact that only one peer will be created for the org, and crypto material is generated for that only.
Let’s move to the demo in just three steps:
Step 1: Bringing up the test-network
./network.sh up
If everything completes smoothly, then you will be able to see the following three containers- two peers & one orderer.

So what actually happened in the previous command, the answer lies in the network.sh.

The command ./network.sh up itself calls two functions to create orgs and create consortium.
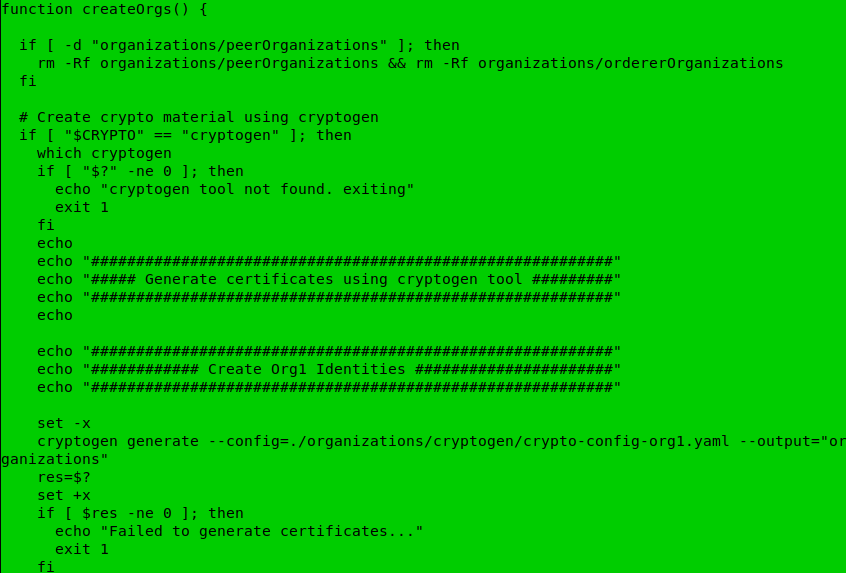
You can see that cryptogen is using the config files residing in organisations folder.
Note: One good enhancement in the test-network in v2.1 is that it also has an option to create identities using fabric-ca. Earlier version created the identities and crypto materials using cryptogen tool. So now it’s on you to choose the fabric-ca or cryptogen to generate the cryptographic materials for orgs. And, as matter fact Fabric doesn’t care at all about from where does the identities/certificates came. It just use them form verification and signing.
Similarly, the code to create org2 and orderer using config files from organisation folder is also present in the same function.
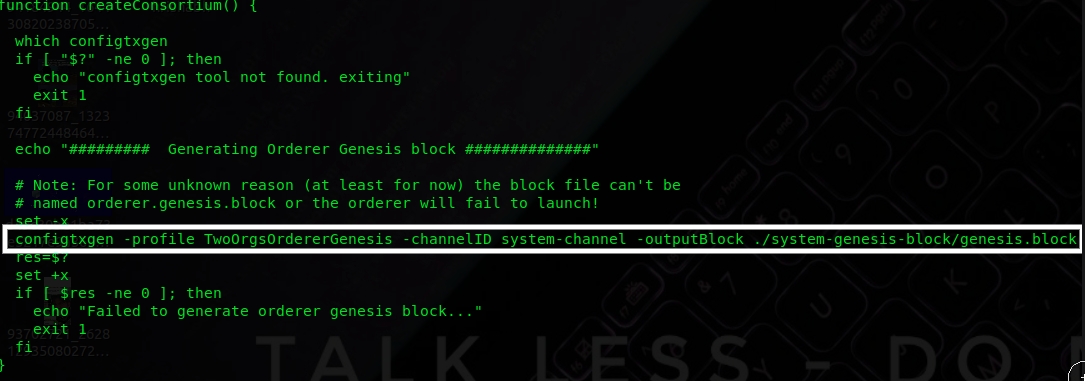
On the very next step, the createConsortium function will create a genesis block in the orderer system channel.
That’s all you have all the necessary containers up at this stage and we can move on the next step to create a channel for transactions between Org1 and Org2.
Step2: Creating a channel
The createChannel() function in network.sh will use createChannel.sh script residing in the scripts folder.
Take a look at the script and you will find, it performs the necessary tasks like updating the anchor peers, creating channel and making the peers to join the channel.
So let’s fire the function using:
./network.sh createChannel
Whoops, you are one step closer to test the network.
Okay, so the last step is to deploy the chaincode on the peers corresponding to the channel which you have just created.
Step3: Deploying the ChainCode
./network.sh deployCC
Check out the script deployCC.sh. It packages, install and instantiate the chaincode on peers.
We will discuss the chaincode structure in a separate blog. Hope I will write it soon 👯 .
Now you are free to interact with chaincodes. But…
From Fabric v2.0, Docker daemon dependency has been eliminated. So, now you can directly use the peer CLI to interact with your network.
To interact first with the peer CLI make sure:
- You have exported the path to fabric binaries, which I think we have already covered in Pre-requisites steps.
- Export the path to config folder in fabric-samples.
export FABRIC_CFG_PATH=$HOME/fabric-samples/config/
After that you are ready to go, you just need to export environment variables for Org1, if you want to use that.
export CORE_PEER_TLS_ENABLED=true
export CORE_PEER_LOCALMSPID=”Org1MSP”
export CORE_PEER_TLS_ROOTCERT_FILE=${PWD}/organizations/peerOrganizations/org1.example.com/peers/peer0.org1.example.com/tls/ca.crt
export CORE_PEER_MSPCONFIGPATH=${PWD}/organizations/peerOrganizations/org1.example.com/users/Admin@org1.example.com/msp
export CORE_PEER_ADDRESS=localhost:7051
After that, you are ready to go to interact with the chaincode installed on the peer.
So, let’s try the query command:
peer chaincode query -C mychannel -n fabcar -c ‘{“Args”:[“queryAllCars”]}’
Similarly, you can invoke other methods of chaincode.
You can also use some other chaincode residing in the chaincode folder of fabric-samples by modifying the deployCC script, or even you can test your own chaincode on the test-network.
Celebrate, you are now aware of managing a Hyperledger Fabric simple network and taking the reference of this test-network, you can design your own network and feel like a Blockchain Architect.
Feel free to discuss some of the errors you may encounter while setting up the network, in the comments.
I’m leaving my bash.rc important exports in case you missed something:
export GOPATH=$HOME/go
export PATH=$PATH:/usr/local/go/bin:$GOPATH/bin
export PATH=$HOME/fabric-samples/bin:$PATH
export PATH=$PATH:$GOPATH/bin
export FABRIC_CFG_PATH=$HOME/fabric-samples/config/
Don’t forget to clap, if this blog saved your time 👏 👏 👏

References: